As a marketer, you want to improve your website’s performance and drive more conversions. In many cases, A/B testing could be the answer.
By comparing two versions of a webpage, you can determine which one is more effective at achieving your goals.
In this article, we’ll walk you through the steps to set up A/B testing using Microsoft Clarity and GA4.
Microsoft Clarity is a free heatmap analytics tool that has all the necessary segmentation functionalities to set up A/B testing, especially when Google Optimize is sunsetting as a marketer; you need alternative ways to run your tests.
The easiest and most straightforward way to set up A/B testing is to set up two versions of the webpage and direct traffic to each.
By using a URL filter of Microsoft Clarity, you can segment data and analyze them for different versions of your webpage.
But what if you want to test different layouts of the page on the live traffic without different URLs?
Fortunately, Clarity has custom tags (and GA4 custom dimensions), so you can tag your users and filter them in reports.
What Are Microsoft Clarity Custom Tags?
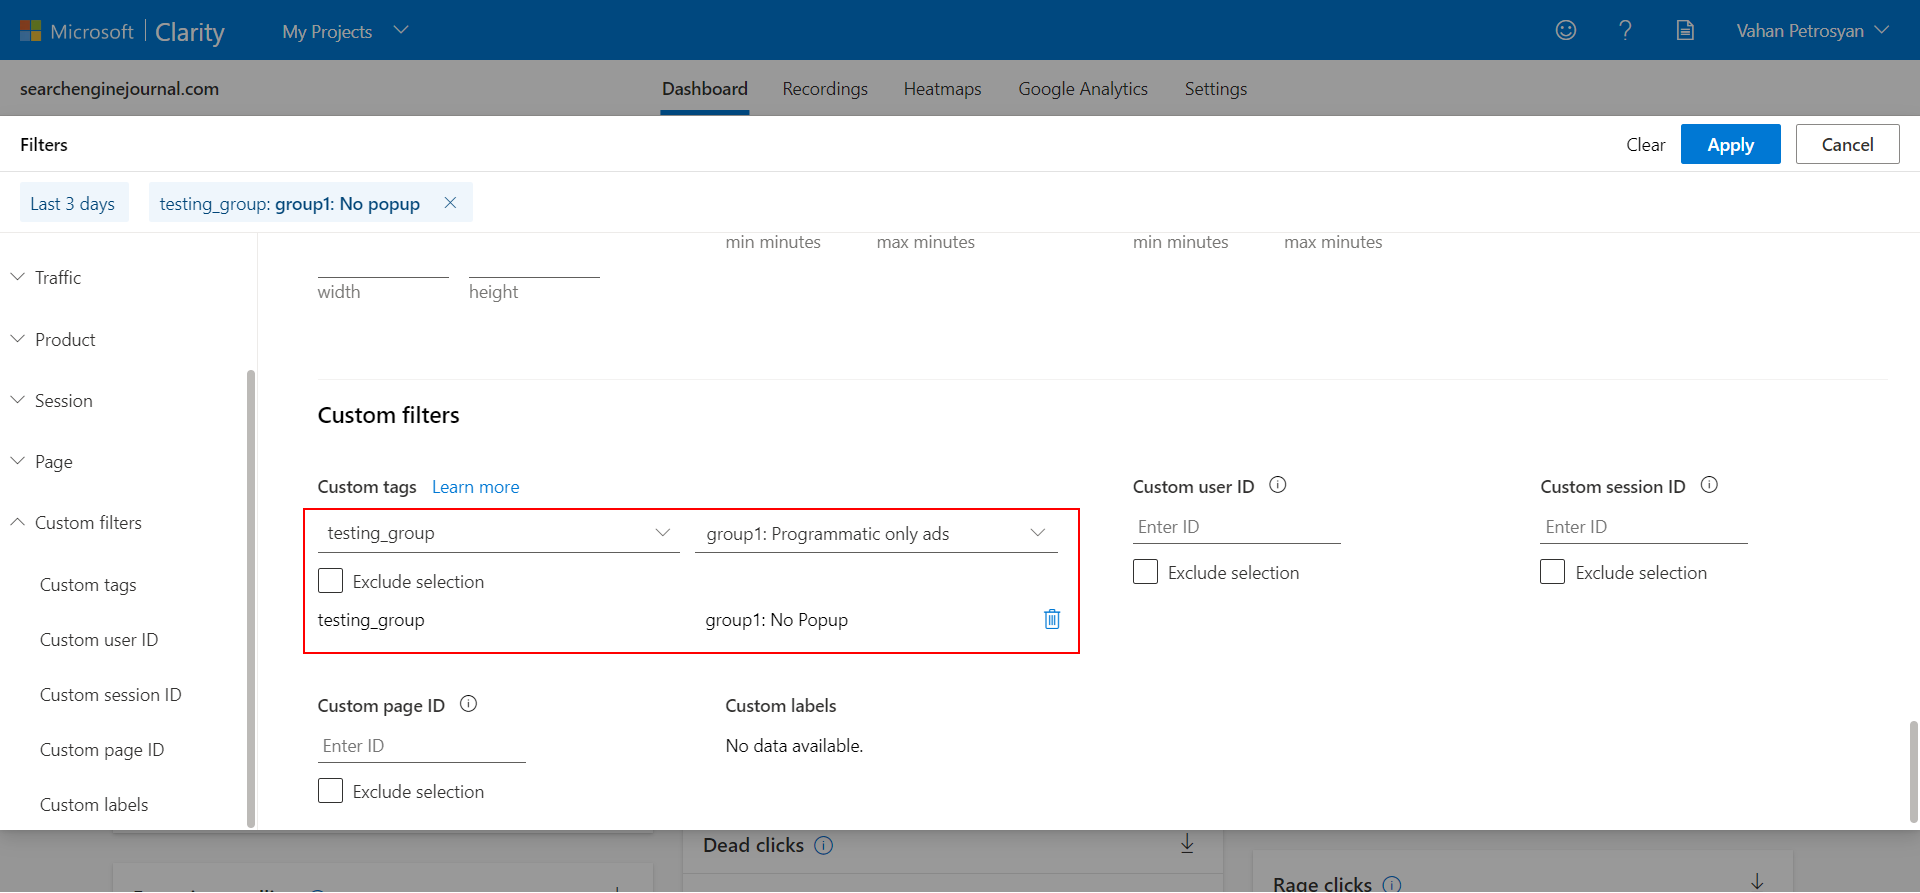
Clarity’s custom tags are arbitrary alphanumeric custom labels you can assign to the visitor and later use to segment data and analyze recordings and heatmaps for different testing groups.
 Screenshot from Clarity, May 2023
Are There Limits To Custom Tags In Microsoft Clarity?
There are no limits. You can add as many tags as you want to your project without any restrictions or limitations.
How To Tag A Visitor Using Microsoft Clarity
Tagging is as simple as running a small snippet of JavaScript code:
clarity("set", "experiment", "group_name");But I would like to guide you through a specific, real-life example of how this can be used from our experience.
At SEJ, we conduct various tests on different types of ads and webpage layouts to gain insights into how user behavior is impacted by factors such as the type of banner ad or webpage layout.
Examples of A/B tests we are running:
- Static banner ads vs. animated banner ads.
- Left sidebar vs. right sidebar.
- Changing menu labels.
The goal is to understand in what case users scroll deeper into the article and thus engage in reading – or whether changing menu labels can help drive more clicks.
1. A/B Testing Static Banner Ads Vs. Animated Banner Ads
We use Google Ad Manager to load ads on our webpage, and thus we can use Google Publisher Tag API to pass key values to our ad server.
We evenly distribute traffic by utilizing the Math.random() function in JavaScript, which returns 1 or 2.
To get the experiment running, copy and paste the below.
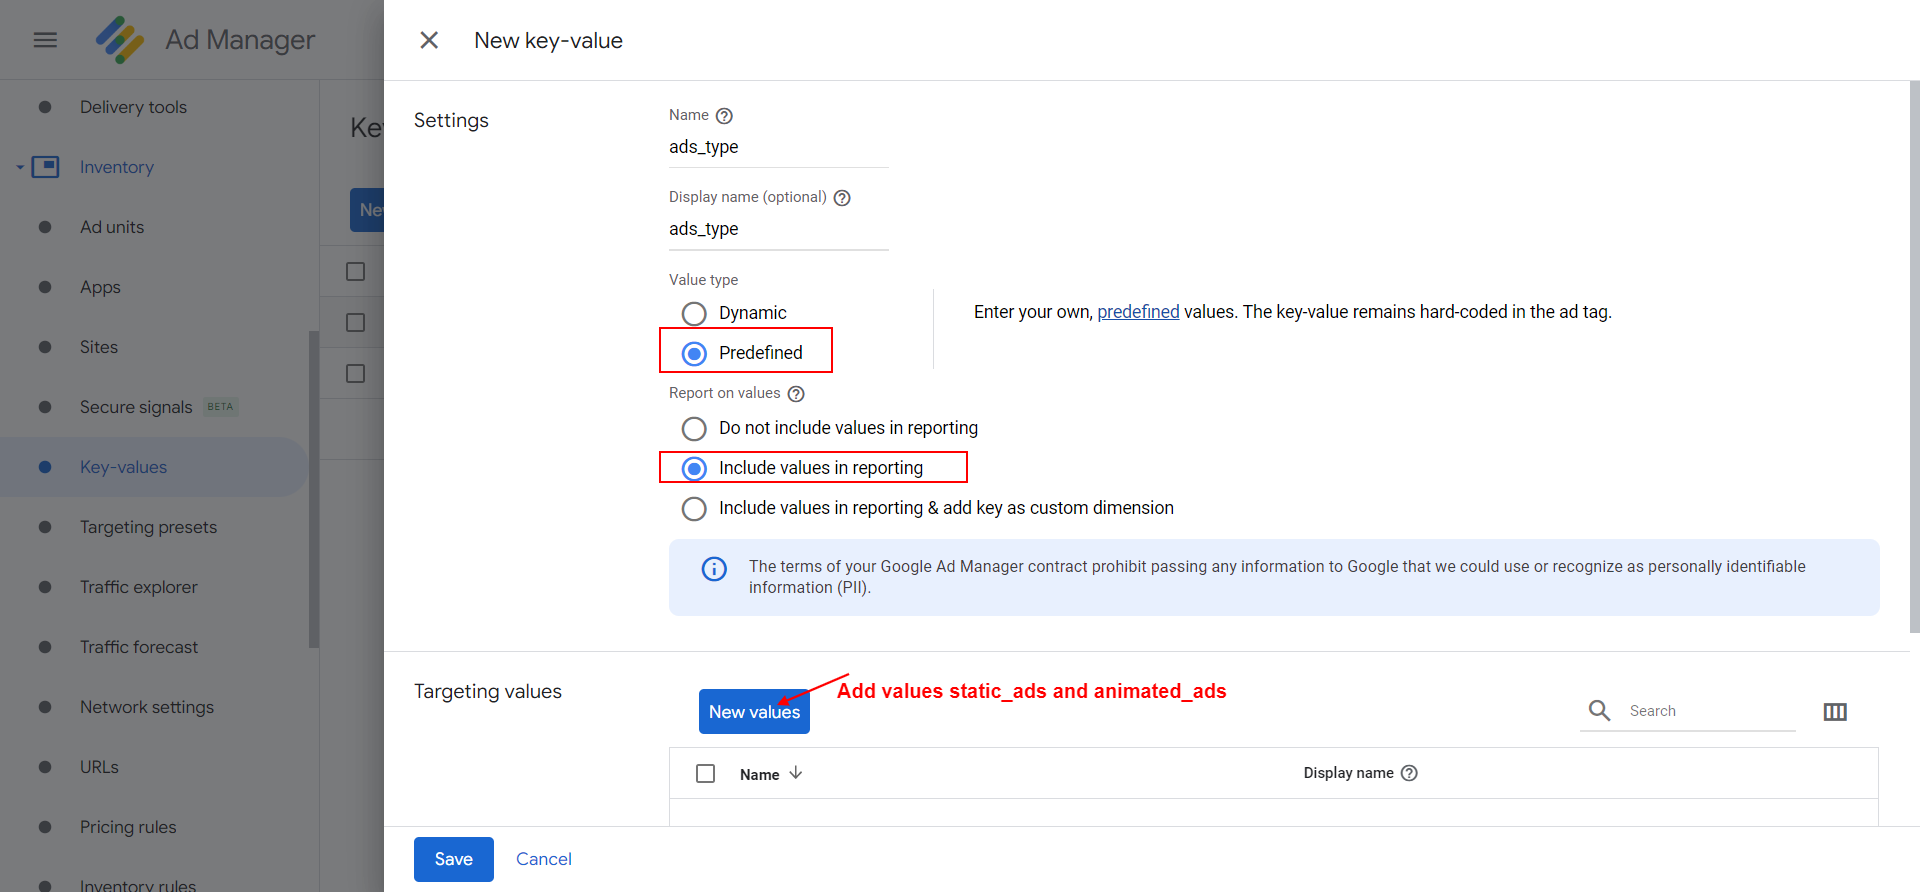
We use key “ads_type” with predefined values “static_ads” and “animated_ads” in GAM to be able to run reports of ads on the GAM side as well, such as CTR for each group.
 Screenshot from Google Ad Manager, May 2023
Then in your webpage <head> section, copy and paste the JS code, or you can use GTM custom HTML tag on every pageview where you have ads.
<script>
   window.group_name = "animated_ads";
   let randomNumber = Math.floor(Math.random() * 2) + 1; // either 1 or 2
   if( randomNumber == 2 ){
      group_name = "static_ads";
   }
document.addEventListener('DOMContentLoaded', function() {
   //make sure publisher tag has loaded
   if( typeof googletag != 'undefined' ){
      googletag.pubads().setTargeting("ads_type", group_name );
   }
   //check if clarity has loaded and set tag "experiment" with values "static_ads" or "animated_ads"
   if( typeof window.clarity != 'undefined' ){
      window.clarity("set", "experiment", window.group_name );
   }
});
</script>
When “DOMContentLoaded” event fires, publisher tag and Clarity are usually loaded. If not, you may consider wrapping JS inside into a setTimeout() function with a small delay.
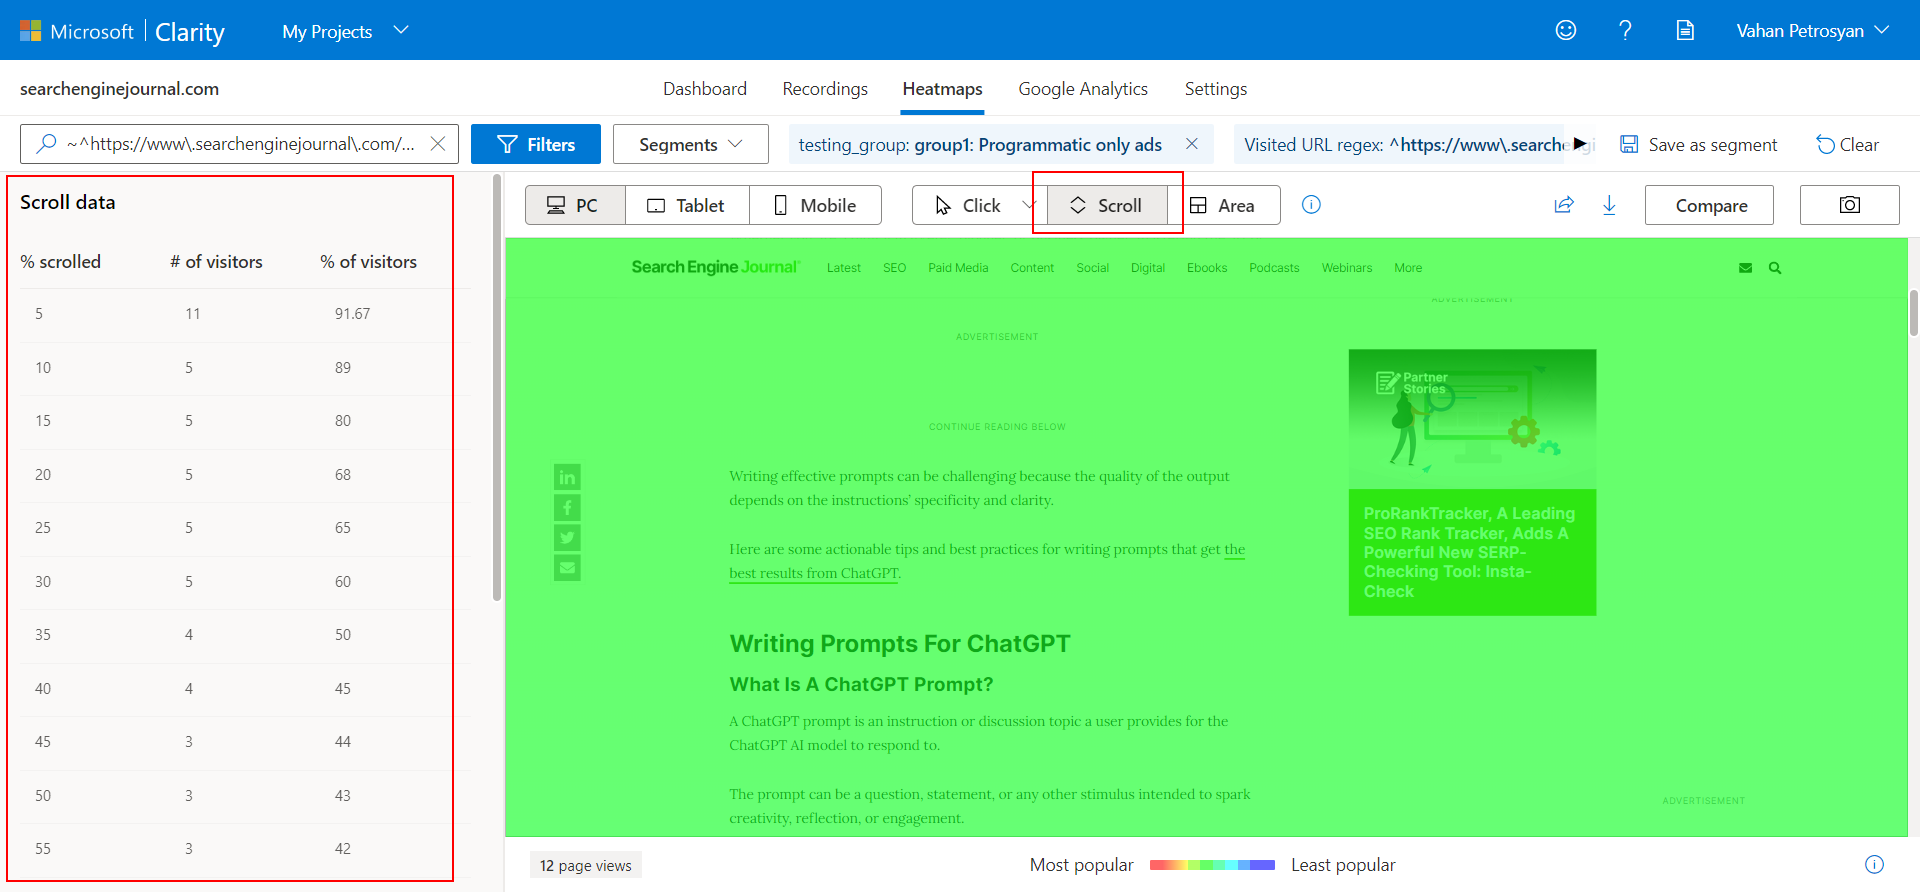
With the ads_type key in GAM, it is possible to configure different banner types to be served to each group. As we have that key set up as a tag value for “experiment” key in Clarity, we can analyze data for each group and run your reports.
 Screenshot from Clarity, May 2023
If you need a specific setup that requires advanced coding you may try using ChatGPT to write for you a code.
If you want to track how users’ conversion rates change in GA4 you can add a custom dimension with the key “experiment” in GA4 and populate it when the configuration tag loads by using datalayer.push method.
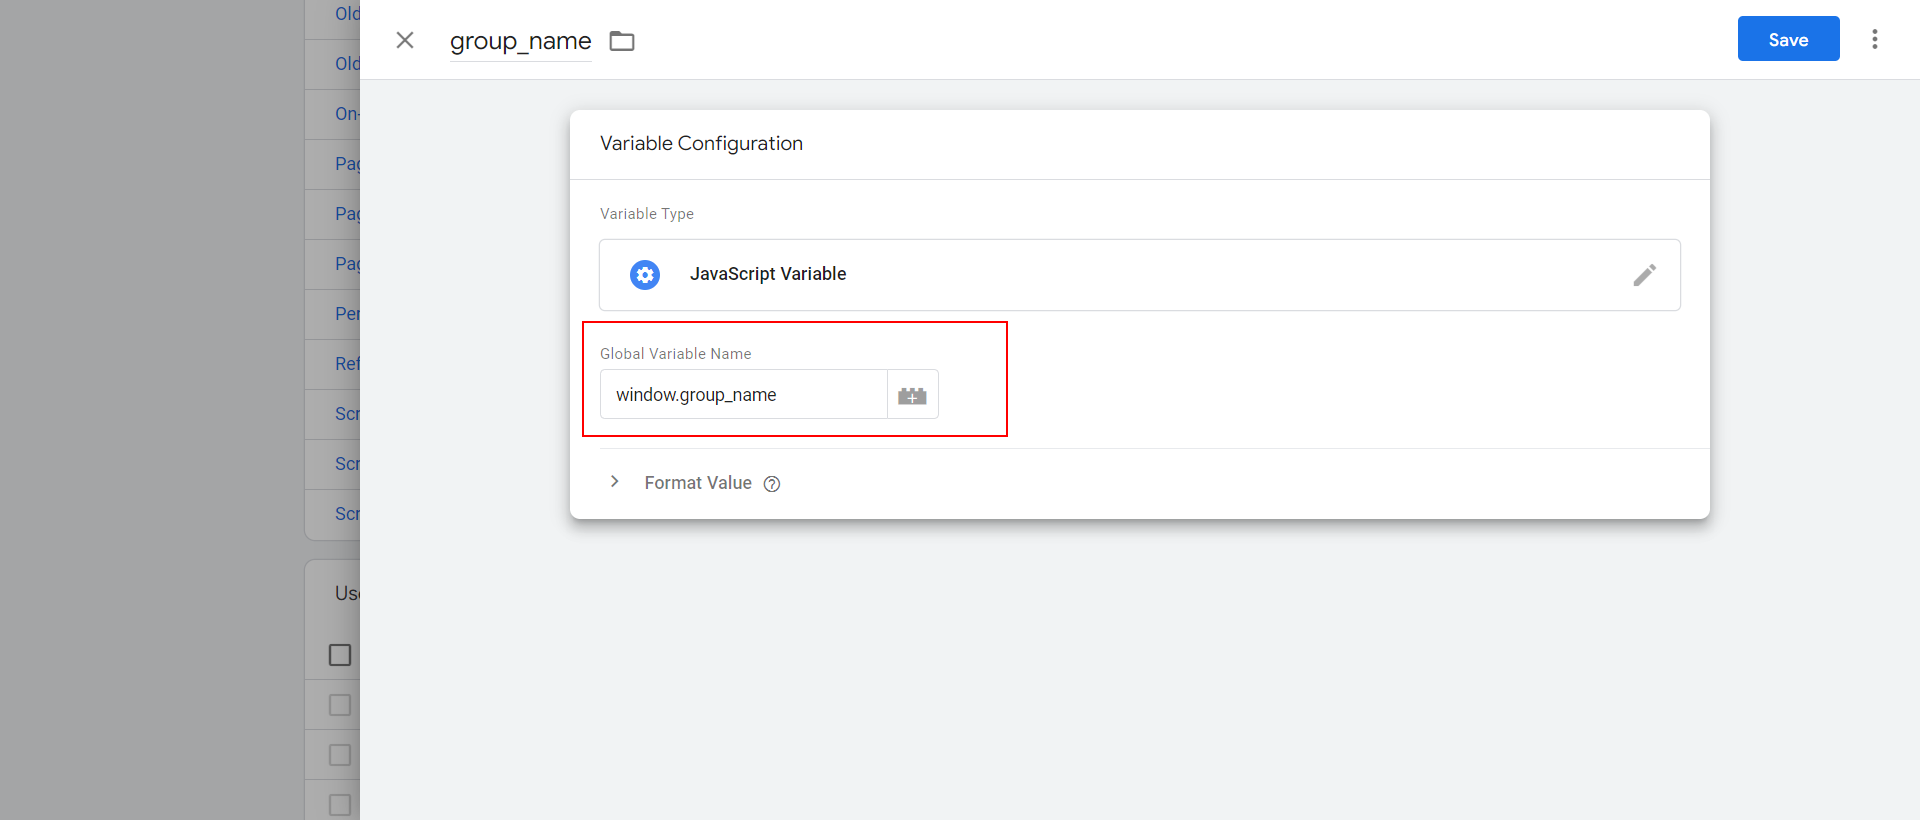
dataLayer.push({ 'experiment': group_name });Alternatively, you can use GTM JavaScript variable to get window.group_name global variable value we set above as a testing parameter.
 Screenshot from GA4, May 2023
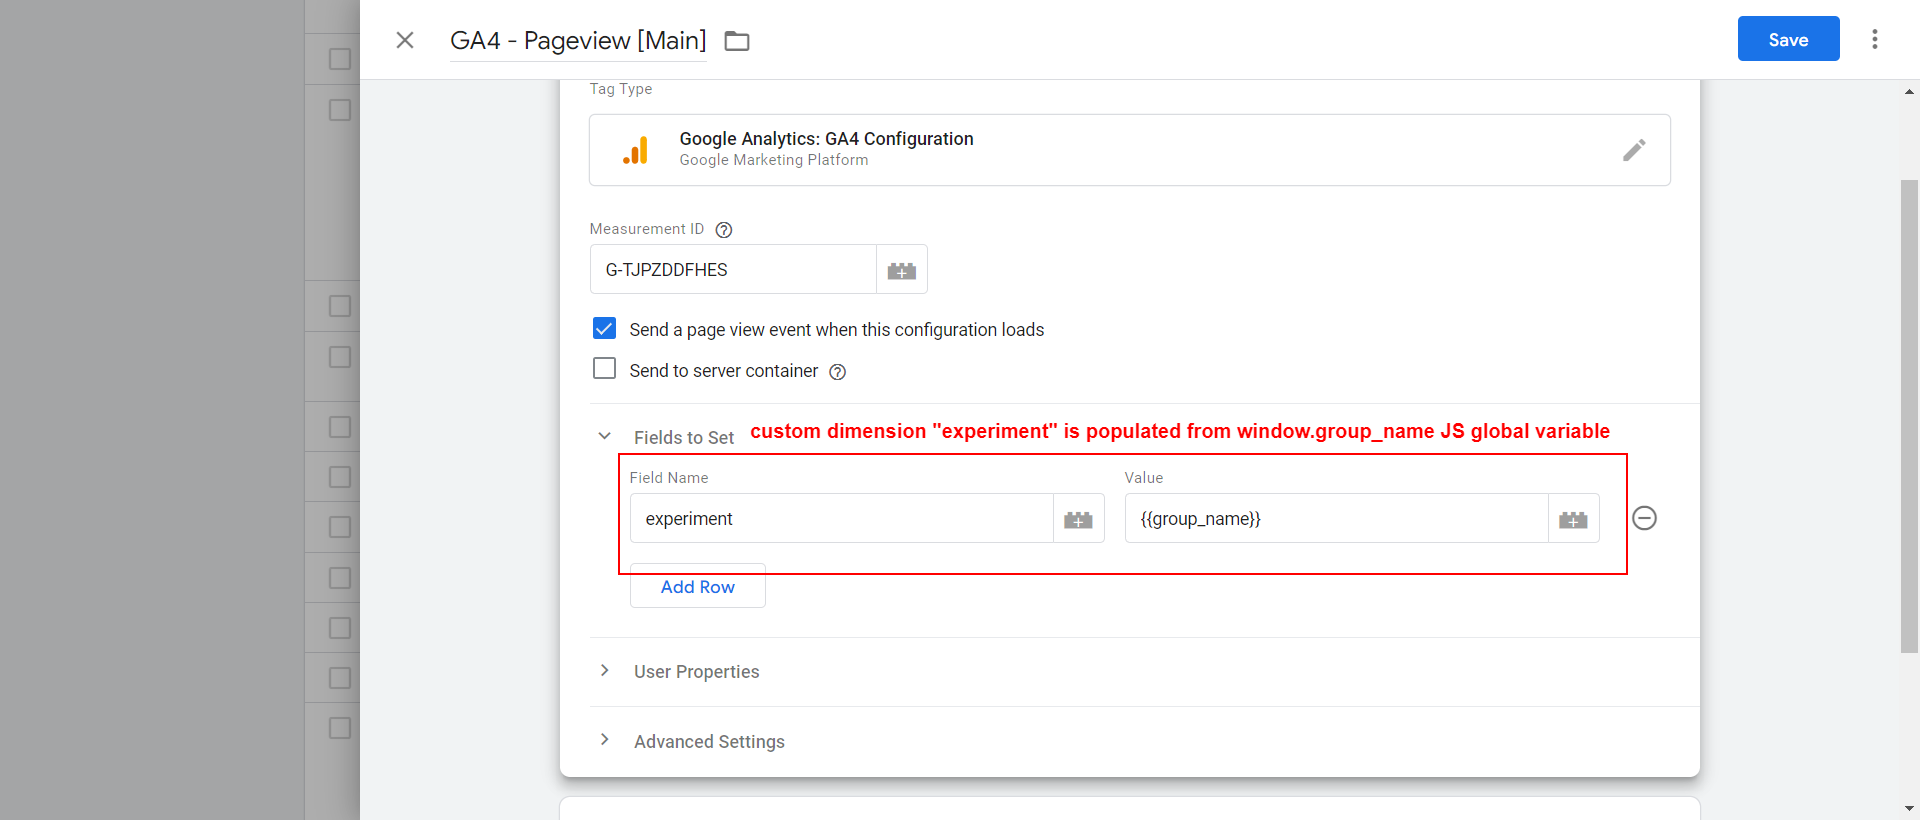
And in the configuration tag, set up a custom dimension to pass that variable value as shown below:
 Screenshot from GA4, May 2023
Populate custom dimension “experiment” from the global JS variable window.group_name, and voila!
Now your experiment custom dimension is passed to GA4, and you can filter reports using the custom dimension “experiment.”
(Quick tip: When naming your custom dimensions, make sure you don’t use any of the reserved parameter names to function it properly.)
2. Left Sidebar Vs. Right Sidebar
The principle is the same. Use Math.random() function in JavaScript in order to split test.
<style>
/*when adding this class to the content div it swaps sidebar position */
.main_content_right{
flex-direction: row-reverse;
}
</style>
<script>
   // since we have no any css under .main_content_left class it will do nothing i.e. sidebar will be the default right;
   window.group_name = "main_content_left"
   let randomNumber = Math.floor(Math.random() * 2) + 1; // either 1 or 2.
   //let randomNumber = Math.floor(Math.random() * 5) + 1; // random number from 1-5. use this if you want to run test on the sample of your traffic e.g. on the 25%.
   if( randomNumber == 2 ){
      group_name = "main_content_right" // we will use group_name as a class name and a custom tag at the same time;
   }
//If DOMContentLoaded has loaded run the code, otherwise attach an event listener
if (document.readyState === 'complete') {
     move_sidebar( group_name )
   } else {
   // DOMContentLoaded event has not yet fired
   document.addEventListener('DOMContentLoaded', function() {
       move_sidebar( group_name );
   });
   }
function move_sidebar( class_name ){
   document.querySelector('.sej-sect>div').classList.add(class_name);// add class
   //check if clarity has loaded and set tag "experiment" with values "right_sidebar" or "left_sidebar"
   if( typeof window.clarity != 'undefined' ){
      window.clarity("set", "experiment", class_name );
   }
   console.log('sidebar position', class_name );
}
</script>
In this case, we are manipulating DOM in order to change the layout.
In your specific case, you may need to apply different CSS for layout adjustments. You can use ChatGPT as a handy tool to help you with your custom coding.
After a certain time, when you have enough sample data for your split testing, you can use Microsoft Clarity’s tag filter “experiment=main_content_left” or “experiment=main_content_right” to segment your data.
3. A/B Test Menu Labels
Again we will be using Math.random() function and manipulating DOM via JavaScript.
We want to test the menu label “Latest” vs. “News” in our website’s navigation bar.
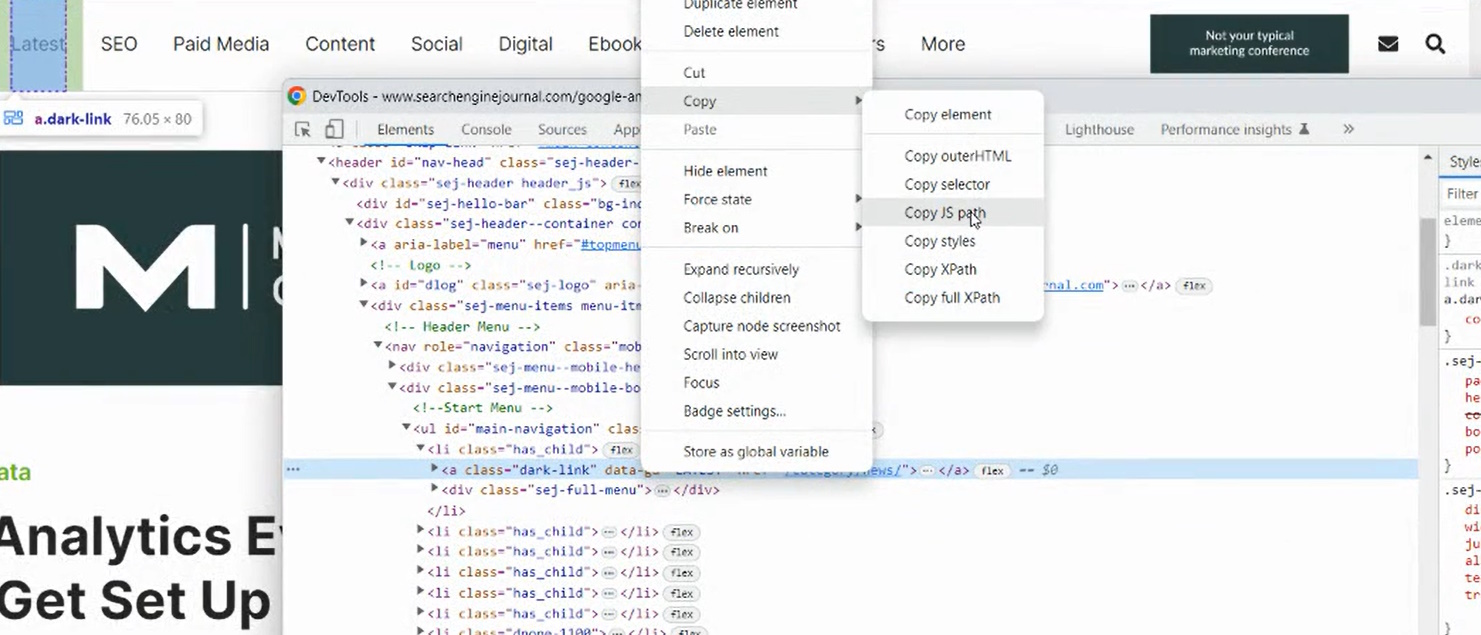
For that, let’s get the JS path using browser DevTools as shown below.
 Screenshot from DevTools, May 2023
We will be using JS path to access elements in the DOM and change the label.
<script>
   //We want to test the menu label for the Latest section in our website's navigation bar
   window.group_name = "Latest"
   let randomNumber = Math.floor(Math.random() * 2) + 1; // either 1 or 2.
   //let randomNumber = Math.floor(Math.random() * 5) + 1; // random number from 1-5. use this if you want to run test on the sample of your traffic e.g. on the 25%.
   if( randomNumber == 2 ){
      group_name = "News" // we will use group_name as a label and a custom tag at the same time;
   }
//If DOMContentLoaded has loaded run the code, otherwise attach an event listener
if (document.readyState === 'complete') {
     change_label( menu_label )
   } else {
   // DOMContentLoaded event has not yet fired
   document.addEventListener('DOMContentLoaded', function() {
       change_label( menu_label );
   });
   }
function change_label( menu_label ){
   document.querySelector("#main-navigation > li:nth-child(1) > a").textContent=menu_label;//set label, in your case it will be different
   //check if clarity has loaded and set tag "experiment" with values "right_sidebar" or "left_sidebar"
   if( typeof window.clarity != 'undefined' ){
      window.clarity("set", "experiment", menu_label );
   }
   console.log('menu label', menu_label );
}
</script>
To add your code, you can either insert it into the <head> section of your webpage or use GTM, as explained earlier.
Note that if you’re tracking with GA4, you’ll also need to use a custom dimension.
To pull reports in GA4 you would need to use “Explorer Reports” and filter your metric by custom dimension “experiment”.
Conclusion
Buying A/B testing tools can be expensive, and they may not always offer the specific features you need for your goals.
For instance, none of the A/B testing tools we tried could provide a user-friendly interface for testing different types of ads without custom coding.
However, the methods described here may require some effort to learn custom coding.
With ChatGPT available to help you write code, however, the process shouldn’t be too hard.
More resources:
Featured Image: Burdun Iliya/Shutterstock
!function(f,b,e,v,n,t,s) {if(f.fbq)return;n=f.fbq=function(){n.callMethod? n.callMethod.apply(n,arguments):n.queue.push(arguments)}; if(!f._fbq)f._fbq=n;n.push=n;n.loaded=!0;n.version='2.0'; n.queue=[];t=b.createElement(e);t.async=!0; t.src=v;s=b.getElementsByTagName(e)[0]; s.parentNode.insertBefore(t,s)}(window,document,'script', 'https://connect.facebook.net/en_US/fbevents.js');
if( typeof sopp !== "undefined" && sopp === 'yes' ){ fbq('dataProcessingOptions', ['LDU'], 1, 1000); }else{ fbq('dataProcessingOptions', []); }
fbq('init', '1321385257908563');
fbq('track', 'PageView');
fbq('trackSingle', '1321385257908563', 'ViewContent', { content_name: 'microsoft-clarity-ab-test', content_category: 'analytics-data technical-seo' }); } });

